Summer evenings are the best time to cook outside, whether that’s on a patio at the edge of the garden or at a campsite under the trees. But once the sun goes down, cooking gets hard. You can’t tell whether the chicken is browned, you grab the pepper instead of the salt, and a string of fairy lights that looks lovely does almost nothing for the cutting board.
Outdoor lighting also affects the garden around it. Night-flying moths, which are important pollinators, along with many other insects, are drawn to bright, cool-toned light. A good outdoor cooking lighting plan does two things: it puts strong, accurate light where you work, and it keeps everything else soft, warm, and brief.
Why Cooking Light Is Different
- Color accuracy matters. To judge whether food is cooked, you need daylight-like light (roughly 4000–5500K) at the work surface. Warm or red light distorts colors.
- The whole work surface needs coverage. A 3–5 foot stretch of prep, cooking, and cleanup space should be evenly lit.
- Hands-free is essential. Cooking takes both hands.
- It runs for hours. From sundown until the last dish is dry.
- It gets splashed. Steam, oil, and water are all part of cooking.
The Three-Layer Plan
Layer 1: Task light over the cooking area. A 360-degree lantern of about 500–1000 lumens, hung 4–6 feet above the work surface and slightly to one side so your arms don’t cast shadows. This is the one place where daylight-color light makes sense.
Layer 2: A headlamp for close checks. Use it briefly to read a thermometer or check a pan. It’s a spot tool, not your main light.
Layer 3: Warm, low path and accent lighting. Low-level lights mark the path to the house or tent, the cooler, and the trash. Choose warm white or amber (around 2700K or lower), point them down, and keep them dim.
The most common mistake is relying only on a headlamp. You get a tunnel of light and darkness everywhere else.
Wildlife-Friendly Lighting Habits
Research on artificial light at night suggests it disrupts moths and other nocturnal insects, and blue-rich light tends to attract more of them. A few simple habits help:
- Keep bright, cool light small and temporary. Only the task lantern should be bright, and only while you’re cooking.
- Use warm or amber light everywhere else. Path and ambient lights should be warm-toned and dim.
- Point light down. Shielded, downward-facing fixtures keep light on the ground instead of the sky and the hedgerow.
- Turn it off when you’re done. Dimmable, rechargeable lanterns make it easy to go from cooking brightness to a low glow, then off.
- Place the task light away from flowering beds. Night-blooming plants like evening primrose and moonflower attract moths, so keep your brightest light away from them.
Bonus: warm, dim light also draws fewer mosquitoes and other bugs to your dinner table.
What to Look for in a Lantern
- 360-degree light pattern
- Adjustable brightness, ideally with a warm mode for after dinner
- 500–1000 lumens at full output
- USB-C rechargeable
- A hanging hook or magnetic base
- Splash resistance of IPX4 or better
- 5+ hours of runtime at the setting you’ll actually use
Mounting Options
- A shepherd’s hook or garden pole, which is easy to place near a patio
- A pergola beam or patio umbrella frame
- A telescoping light stand, which is best for portable setups
- A tree branch, which is free but fixes where you can cook
- A magnetic base on a metal kitchen lid
Avoid setting the lantern on the table. It takes up prep space, gets knocked over, and throws shadows in the wrong places.
Power
For backyard cooking, USB rechargeables are simple: charge indoors and use outside. For camping, a portable power station with a small solar panel keeps lights, a faucet pump, and phones charged for days. Keep one basic AA flashlight in a known spot as a backup.
Built-In Lighting
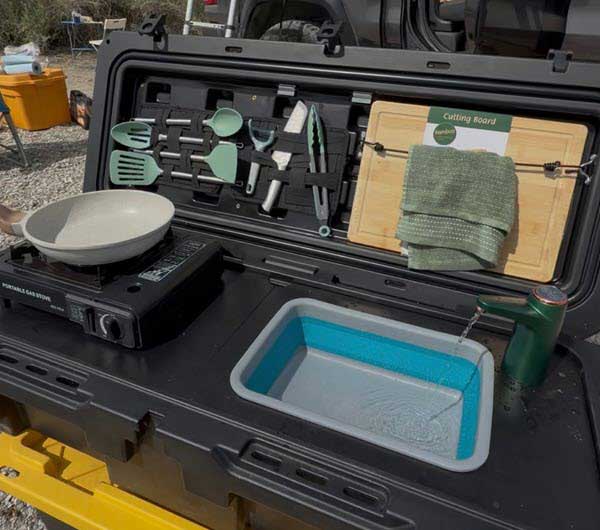
An all-in-one camp kitchen includes an LED light along with the stove, sink, faucet, and storage in one weatherproof case, so the light is always packed and comes out whenever the kitchen does. That’s useful whether the “kitchen” is at the edge of your garden or at a lakeside campsite.
Quick Setups by Situation
- Patio dinner: One task lantern plus warm, dim path lights, all off after cleanup.
- Family camping: Add a second lantern for the dish area and headlamps with red mode for nighttime bathroom trips.
- Longer trips: Full three-layer setup plus a power station and solar panel.
Final Thoughts
Good outdoor lighting isn’t about more light. It’s about light in the right place. Light the cooking area brightly and accurately, keep everything else warm, low, and brief, and switch it all off when dinner is done. You’ll cook better after dark, and the moths and other night visitors in your garden will be better for it.